Step 1
Create a new document that is 1024 x 645 px.
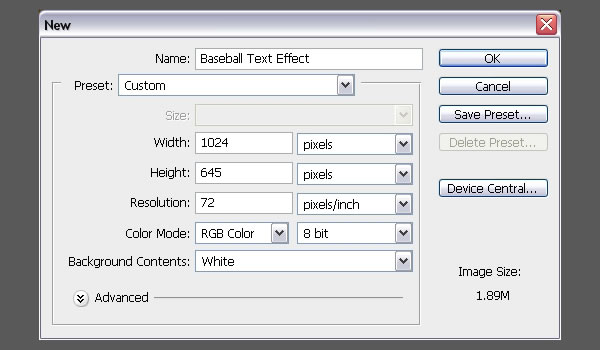
You can use any other values for the Height and Width depending on the text you are going to create.
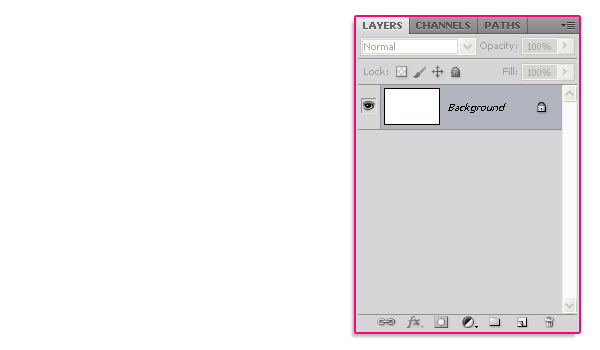
Download the Grass Texture 1, and place it on top of your “Background” layer, then resize it as needed.
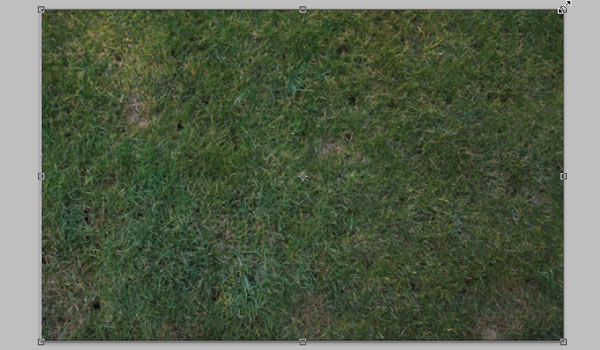
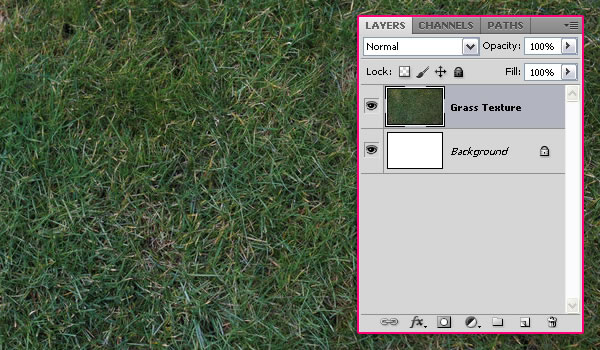
Rename the layer to “Grass Texture”.
Step 2
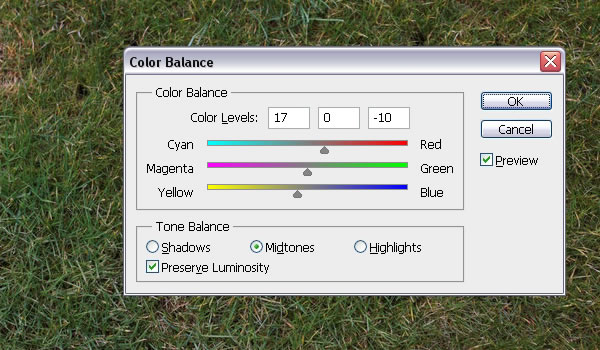
The grass colors are a bit dark and desaturated. To fix that, go to Image > Adjustments > Color Balance, make sure that Midtones is the active option under Tone Balance, then modify the values as shown below.
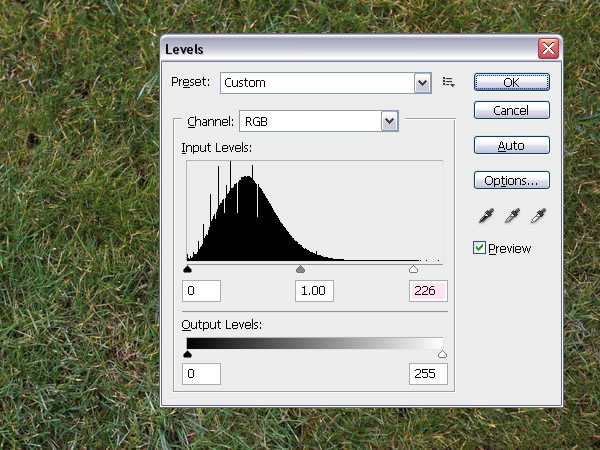
Go to Image > Adjustments > Levels, and change the Highlights value to 226. This will brighten up the texture a little bit. We will be using Adjustment Layers later, so that would be it for the grass texture for now.
Step 3
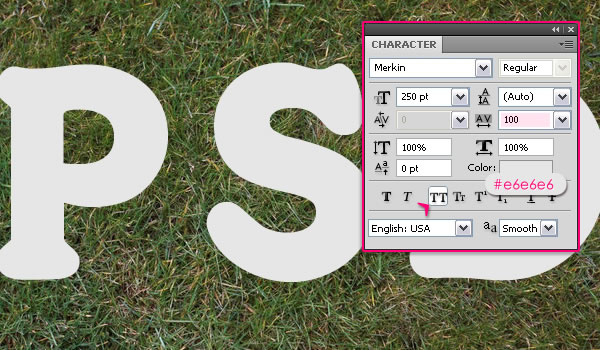
Create the text using the font Merkin. The color is #e6e6e6 and the Size is 250pt. Set the Tracking value to 100 to avoid overlapping, and click the All Caps icon.
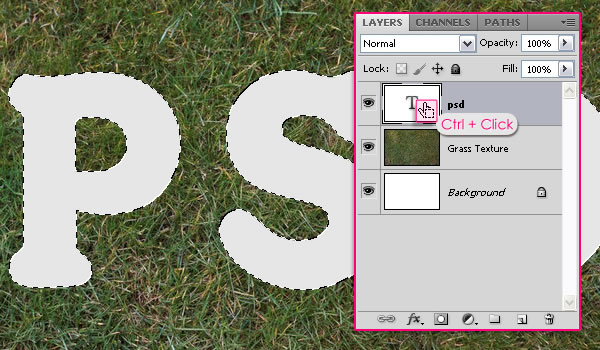
Press the Ctrl/Cmd key and click the text layer’s icon to create a selection.
Step 4
Go to Select > Modify > Expand, and type in 15. This will expand the selection 15 px outwards.
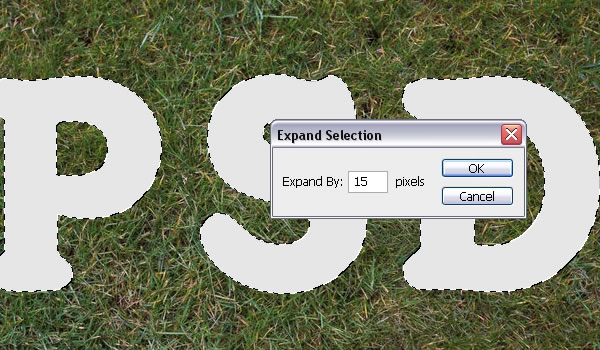
Create a new layer below the text layer and call it “Stroke”.
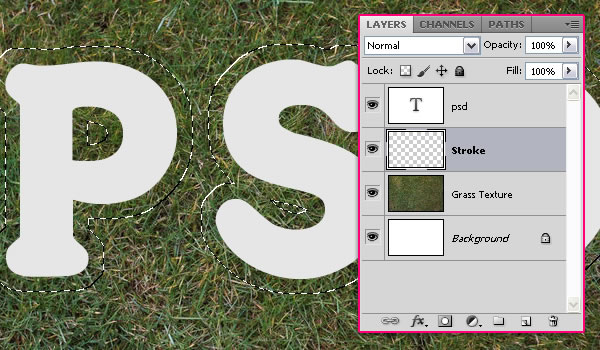
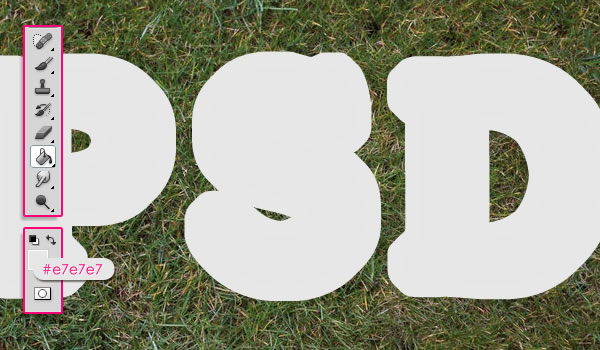
Set the Foreground color to #e7e7e7, and fill the selection with that color. You can go to Select > Deselect, or press Ctrl/Cmd + D to get rid of the selection.
Step 5
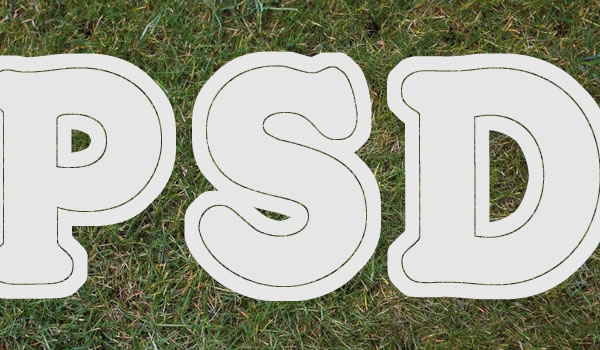
We are going to separate the stroke from the text. So Ctrl/Cmd + Click the text layer’s icon once again, then go to Select > Modify > Expand, and type in 1.
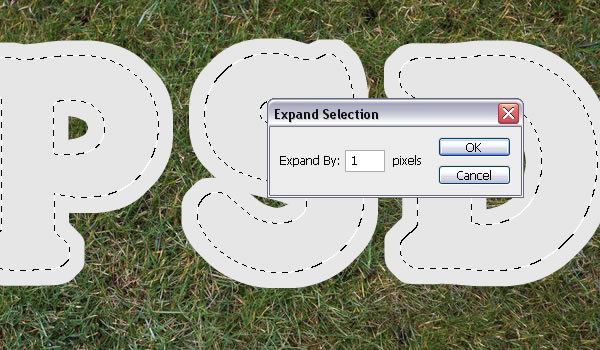
Make sure that the “Stroke” layer is active (selected), and hit Delete to get rid of the inner parts of the stroke.
Step 6
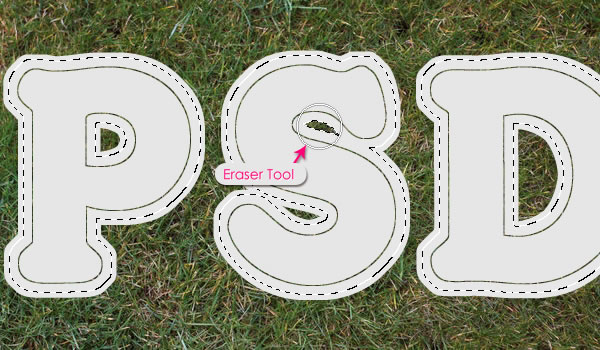
This is optional, but if you want to delete parts of the stroke that connect some edges of the letter to enhance the stroke, then you can use the Eraser Tool. OR, you can simply Ctrl/Cmd + Click the text layer’s icon to create a selection, then expand it (Select > Modify > Expand) in values that are less than 15. For example, the value 10 will be used here to enhance the stroke at the top of the letter S.
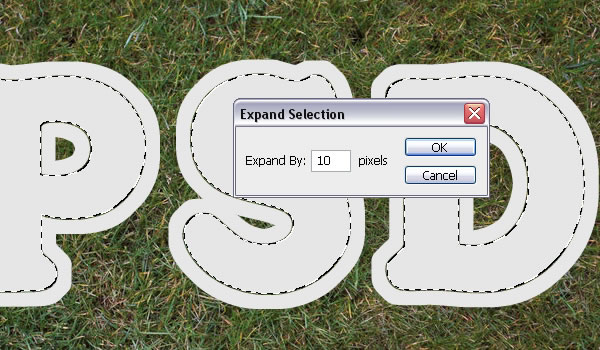
Go to Select > Inverse to invert the selection.
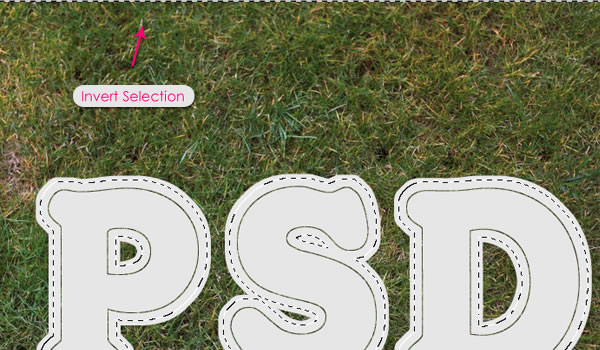
Use the Eraser Tool to remove the unwanted parts. This method gives the exact shape of the unwanted areas, instead of erasing it randomly. Of course, smaller “Expand” values enable you to erase larger areas, and vice versa.
Step 7
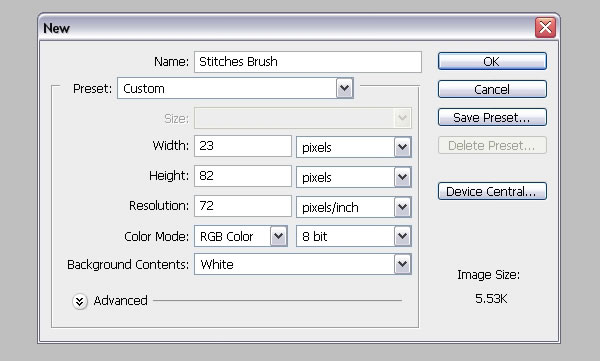
Now, it’s time to create the Stitches Brush. So go ahead and create a new 23 x 82 px.
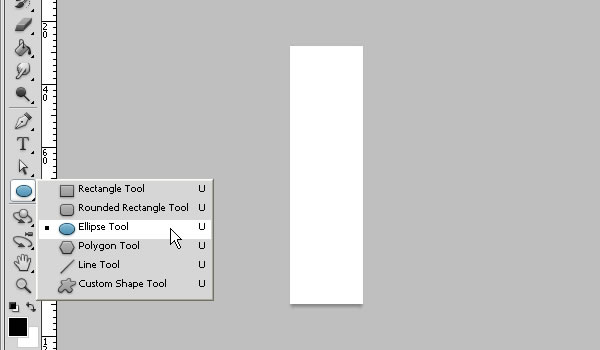
Pick the Ellipse Tool and set the Foreground color to Black.
Click on the top left corner of the document and drag to the lower right corner to create an ellipse.
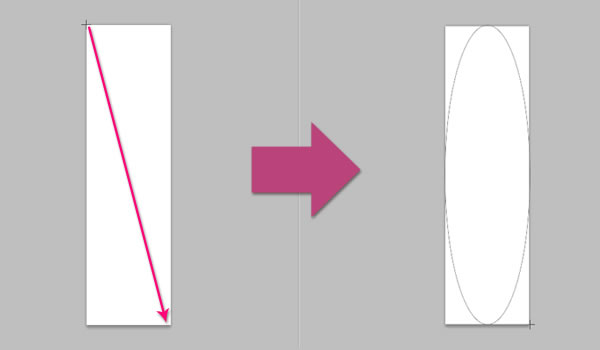
Don’t worry if some edges of the ellipse do not appear, they will in the next step.
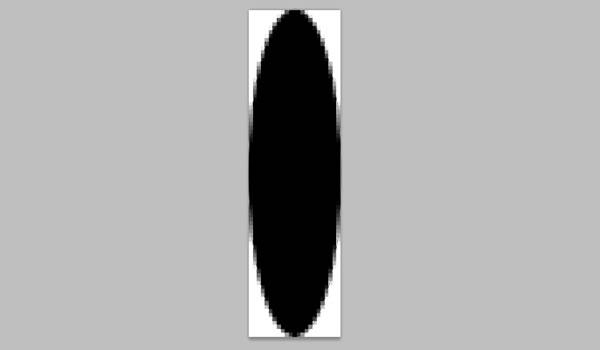
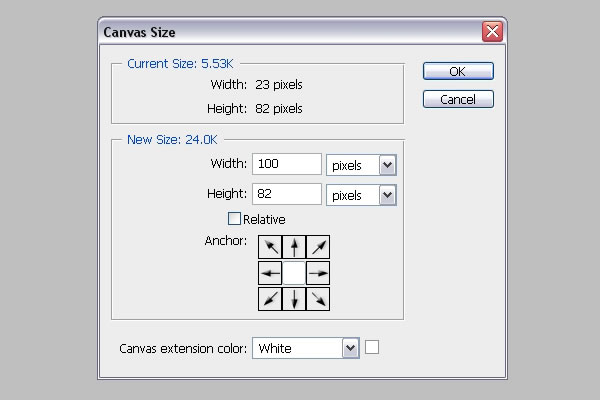
To show all the edges and continue creating the brush, go to Image > Canvas Size, and set the Width to 100 px.
Step 8
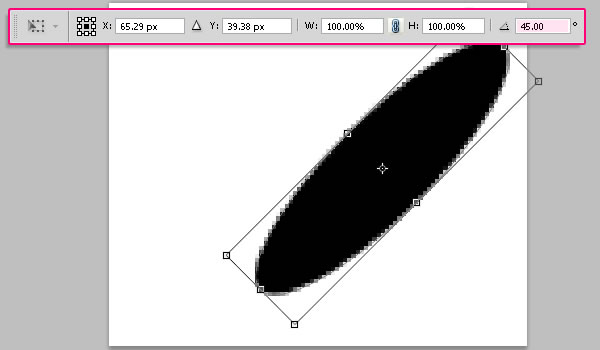
Press Ctrl/Cmd + T to enter the Free Transform Mode. Rotate the ellipse 45° clockwise. (You can type the value in the Rotate field in the Options bar at the top). Hit Enter/Return to accept and get out of the Free Transform Mode
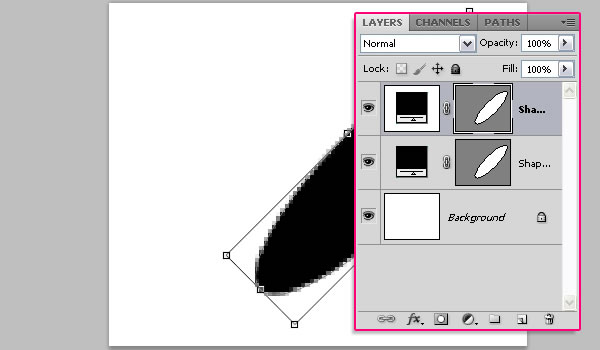
Duplicate the ellipse shape layer, and press Ctrl/Cmd + T to free transform the copy.
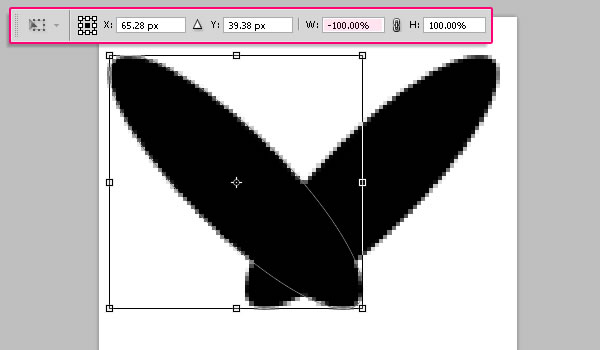
Type -100% in the Width field (in the Options bar at the top) to flip the ellipse horizontally. Hit Enter/Return to accept.
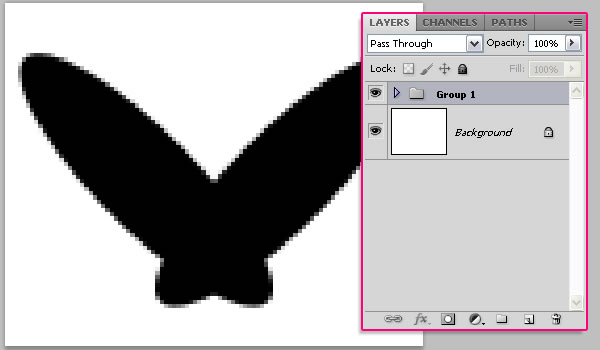
Next we are going to rasterize the two shape layers, but first, group them so that you’ll have the original layers available in case anything goes wrong after rasterizing.
Step 9
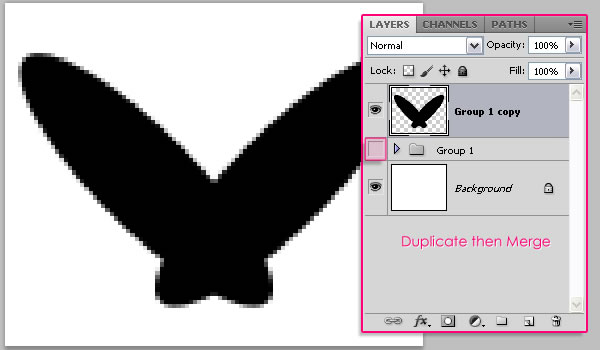
Duplicate the group, go to Layer > Merge Group, or press Ctrl/Cmd + E to merge the group layers and make the original group invisible by clicking the eye icon next to it. Now, both shape layers are rasterized and merged in one layer.
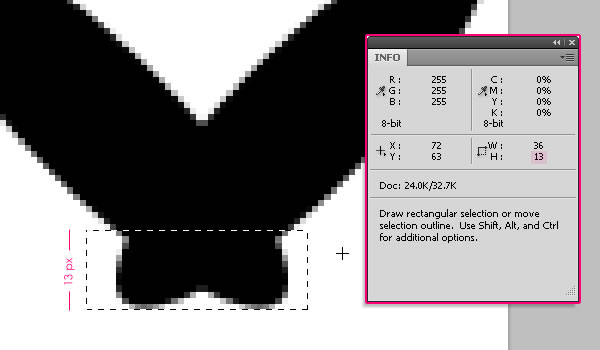
Use the Rectangular Marquee Tool to create a selection around the lower part of the stitch. The selection’s Height should be around 13 px, you can check that in the info panel (Window > Info).
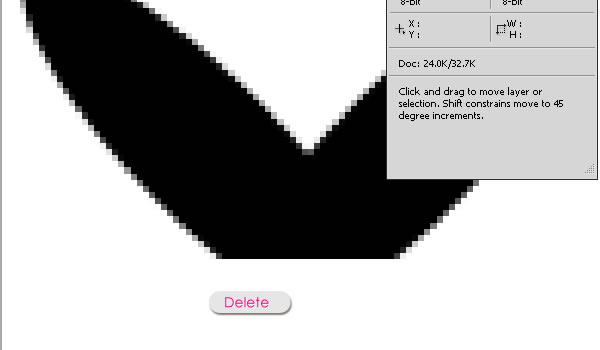
Hit Delete to get rid of the selected part, and press Ctrl/Cmd + D to get rid of the selection.
Once again, use the Rectangular Marquee Tool to create a selection in the middle part of the stitch. The selection’s Width should be around 2 px.
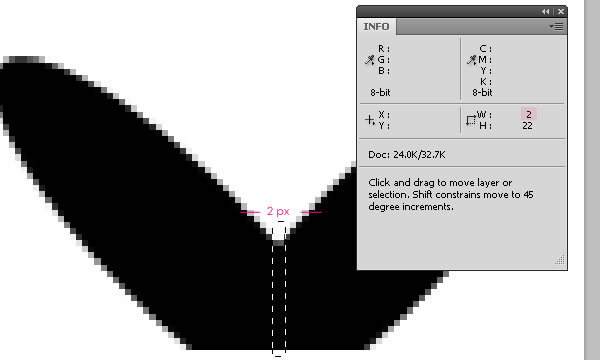
Hit Delete and press Ctrl/Cmd + D.
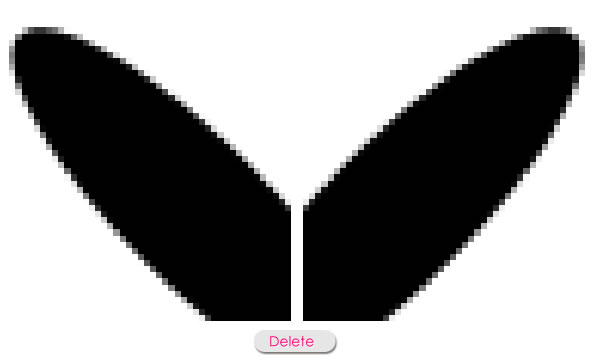
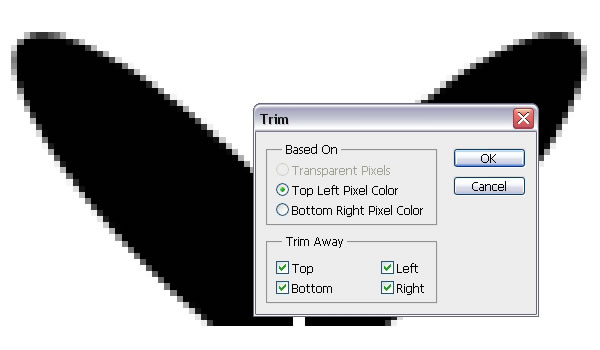
Go to Image > Trim and apply the values below. Once you click OK, the extra white space around the stitch will be removed. This helps define the brush’s size more precisely.
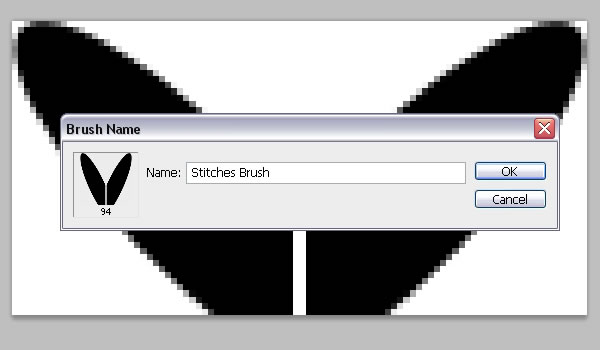
Finally, go to Edit > Define Brush Preset and type in a name for the brush. You can save the PSD file if you want as well.
Step 10
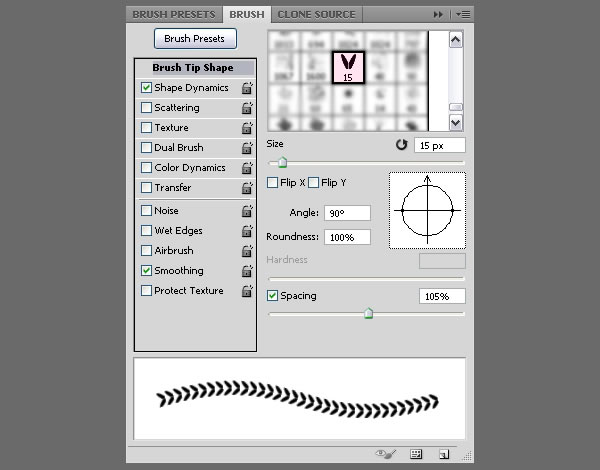
Back to the Original document, open the Brush panel (Window > Brush), and choose the “Stitches Brush” (it’ll probably have a size of something around 90 or 100 px). Change the settings under Brush Tip Shape as shown below, and make sure to change the Angle to 90°.
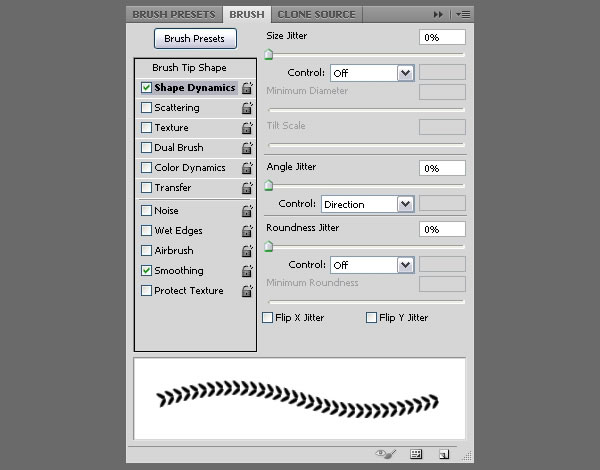
Change the settings under Shape Dynamics as shown below too, and make sure to choose Direction from the Control drop down menu under the Angle Jitter tab. This is important as it will make the stitches follow the direction of the text path instead of having the same angle everywhere.
Step 11
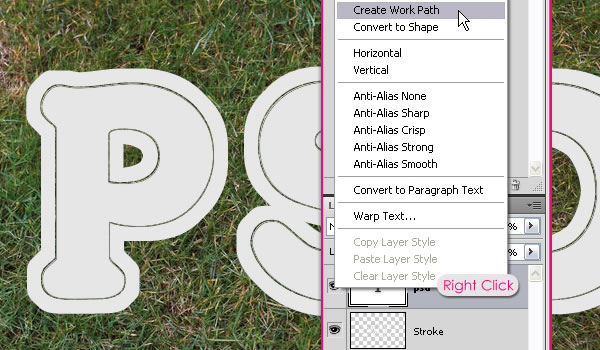
Right click the text layer and choose Create Work Path.
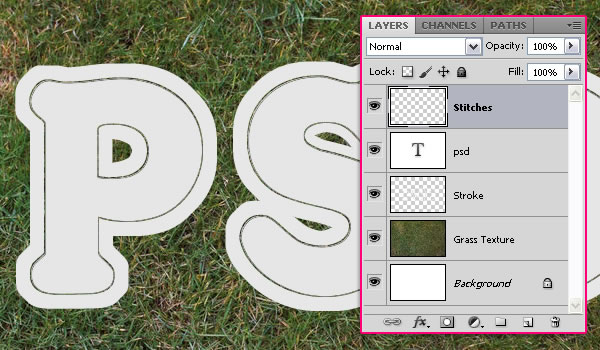
Create a new layer on top of all layers and call it “Stitches”.
Set the Foreground color to #d5002c, pick the Direct Selection Tool, right click the path, and choose Stroke Path.
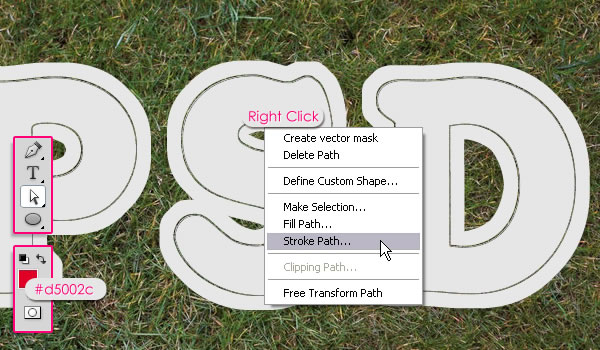
Choose Brush from the Tool drop down menu, and make sure that the Simulate Pressure Box is un-checked.
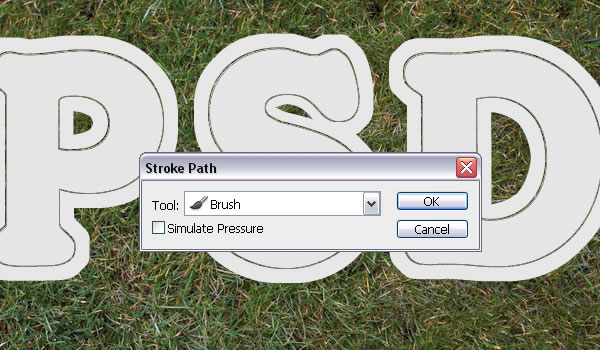
This will stroke the path with the stitches. Hit Enter/Return to get rid of the path.
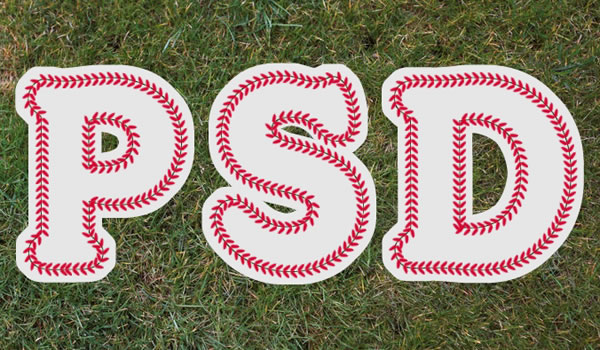
Next, we are going to apply some Layer Styles.
Step 12
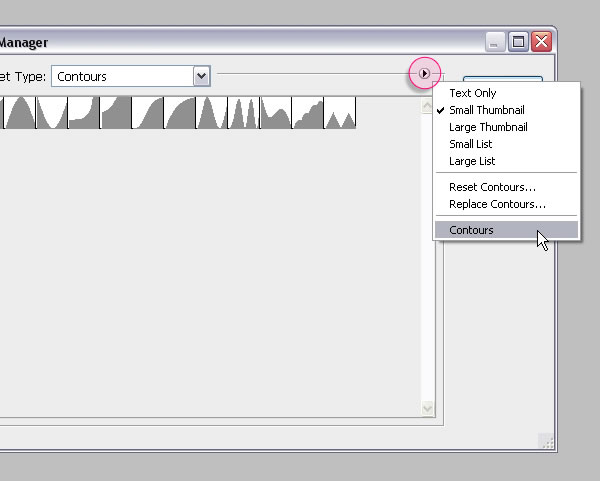
Before applying the Layer Styles, you might need to Load the Contours used. To do so, go to Edit > Preset Manager, and choose Contours from the Preset Type drop down menu.
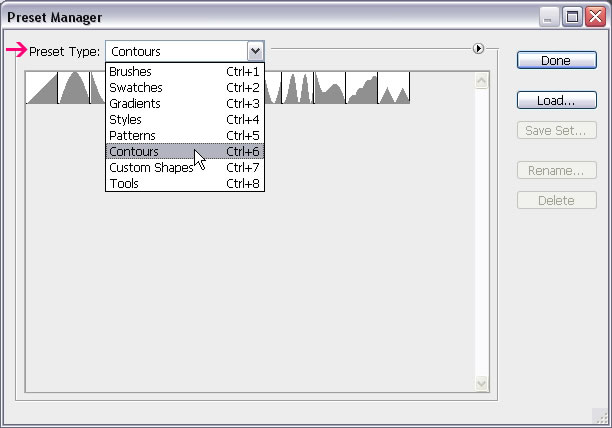
Click the small arrow in the top right corner, and choose Contours
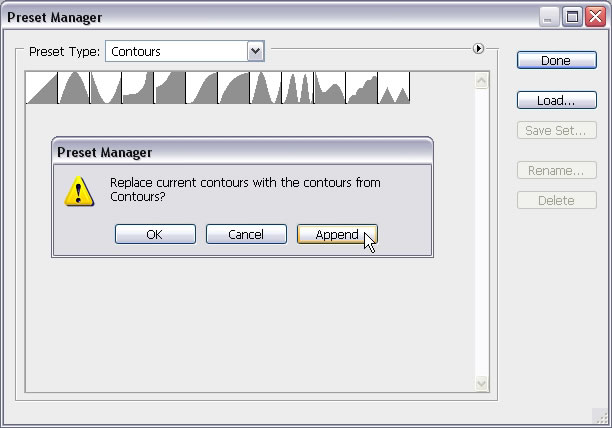
Click Append to add the new contours to the existing ones.
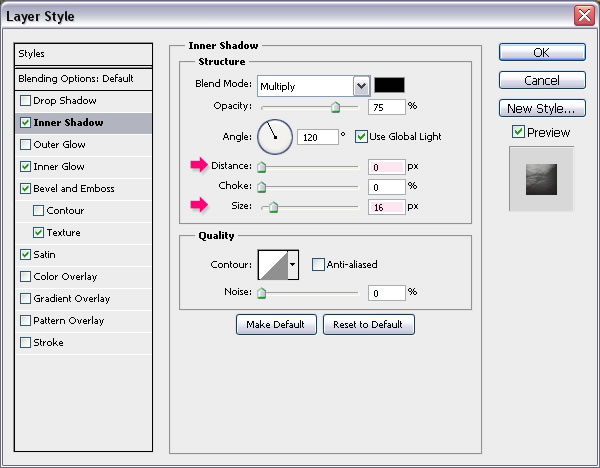
Double click the text layer to apply the following Layer Styles:
Inner Shadow: Change the Distance to 0 and the Size to 16.
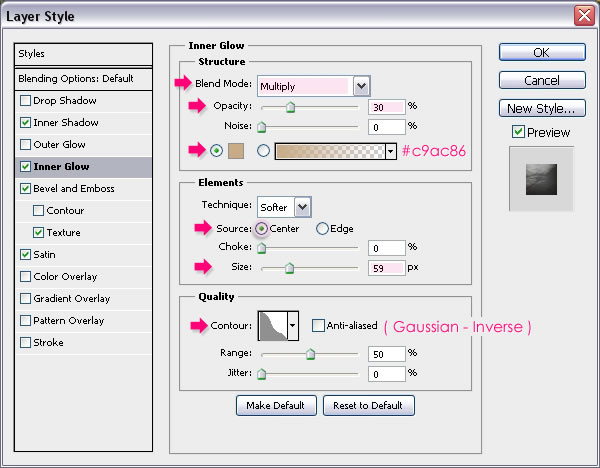
Inner Glow: Change the Blend Mode to Multiply, the Opacity to 30, the color to #c9ac86, the Source to Center, the Size to 59, and the Gloss Contour to Gaussian – Inverse.
Bevel and Emboss: Change the Size to 24 and the Shadow Mode color to #a6a6a6.
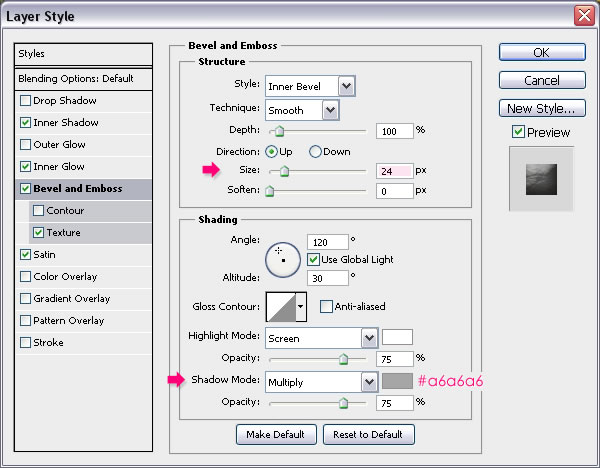
Texture: Load the .pat (pattern) file in the Seamless leather texture folder to use it.
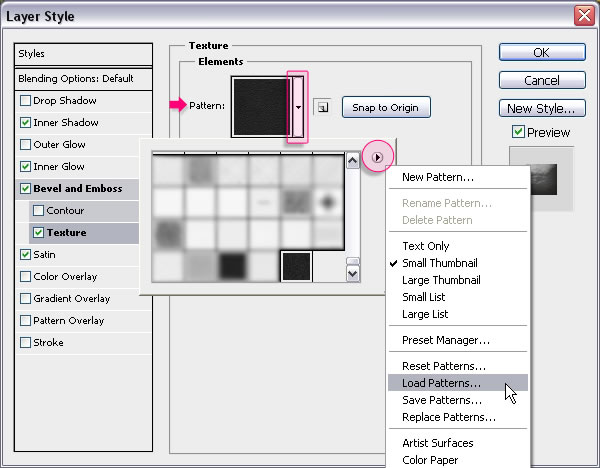
Then change the Scale to 50 and the Depth to 15.

Satin: Just change the color to #e4e4e4.
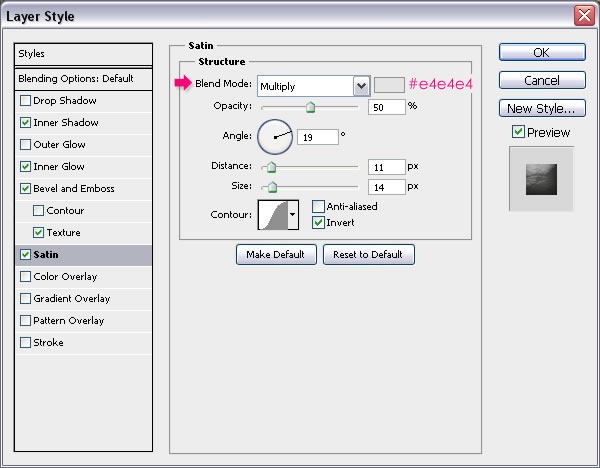
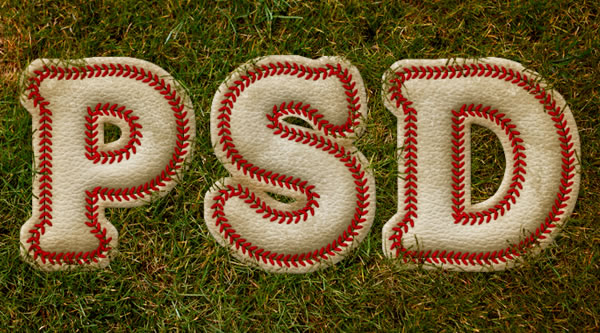
This will create a nice leather-rubber effect.
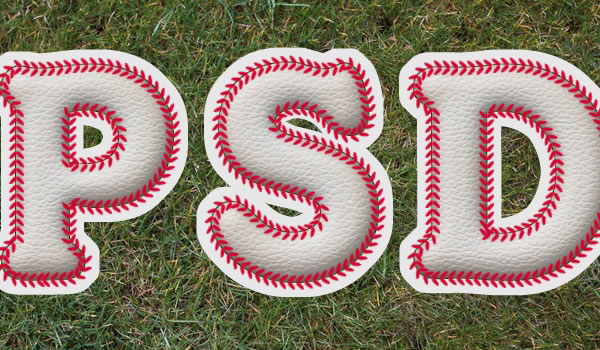
Step 13
Double click the Stroke layer to apply the following Layer Styles:
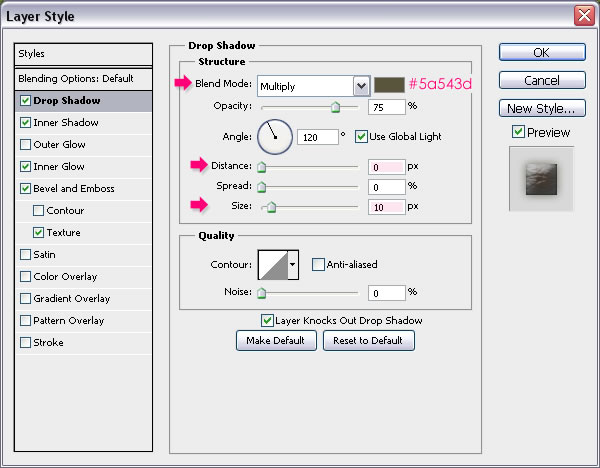
Drop Shadow: Change the color to #5a543d, the Distance to 0 and the Size to 10.
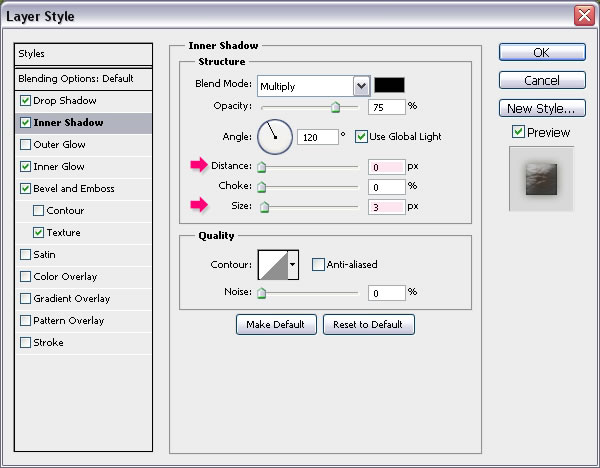
Inner Shadow: Change the Distance to 0 and the Size to 3.
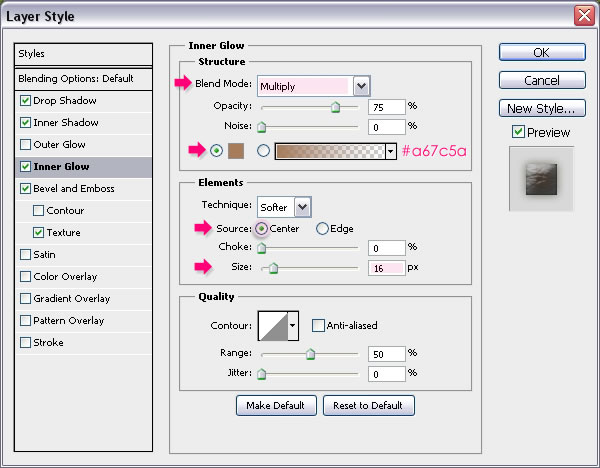
Inner Glow: Change the Blend Mode to Multiply, the color to #a67c5a, the Source to Center, and the Size to 16.
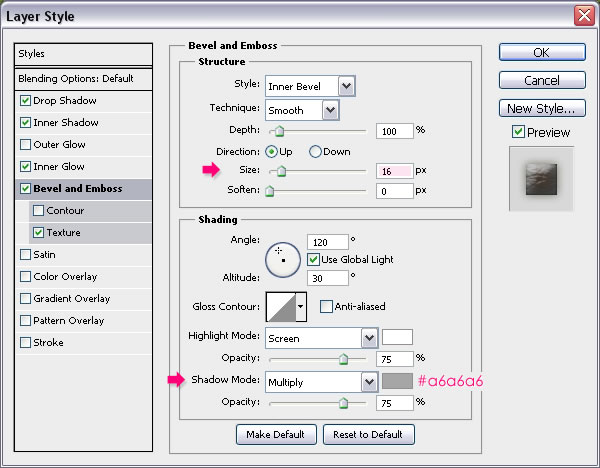
Bevel and Emboss: Change the Size to 16 and the Shadow Mode color to #a6a6a6.
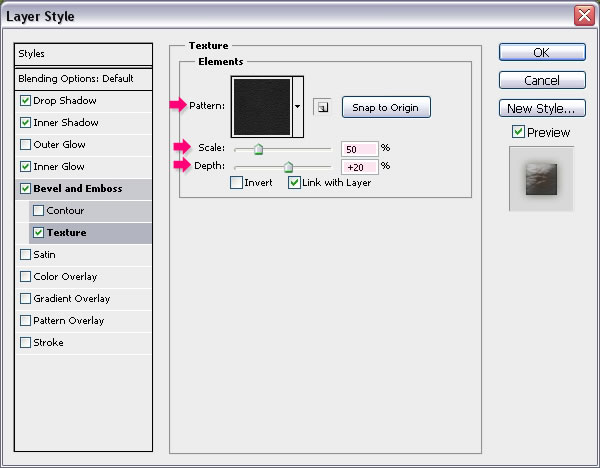
Texture: Use the same Leather texture, and change the Scale to 50 and the Depth to 20.
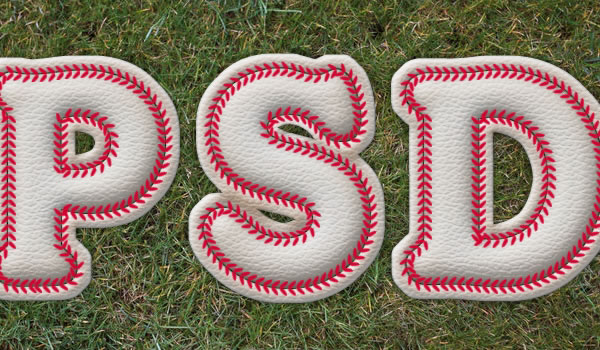
This will apply the effect to the stroke.
Step 14
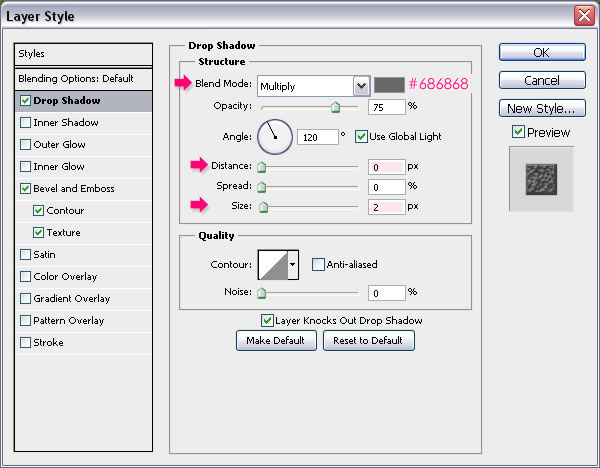
Double click the Stitches layer to apply the following Layer Styles:
Drop Shadow: Change the color to #686868, the Distance to 0 and the Size to 2.
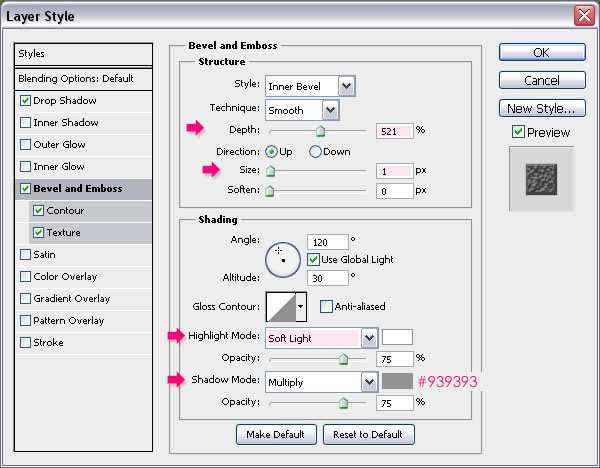
Bevel and Emboss: Change the Depth to 521, the Size to 1, the Highlight Mode to Soft Light, and the Shadow Mode color to #939393.
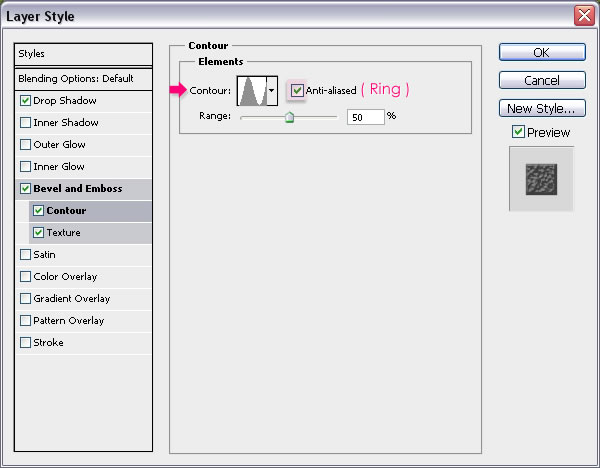
Contour: Choose the Ring contour and check the Anti-aliased box.
Texture: Use the Metal Landscape pattern, and change the Scale to 31 and the Depth to 100.
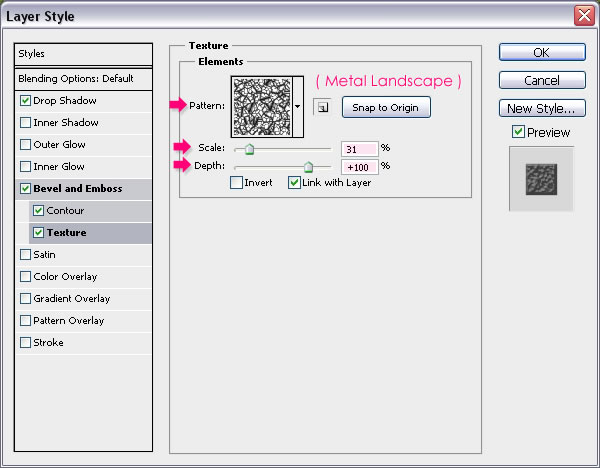
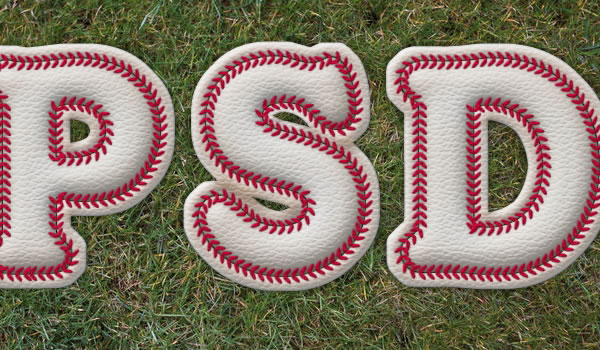
This will add some depth and dimension to the stitches.
That’s it for the Layer Styles.
Step 15
Ctrl/Cmd + Click the text layer’s icon to create a selection, then Ctrl/Cmd + Shift + Click the “Stroke” layer’s icon to add the stroke to the text selection.
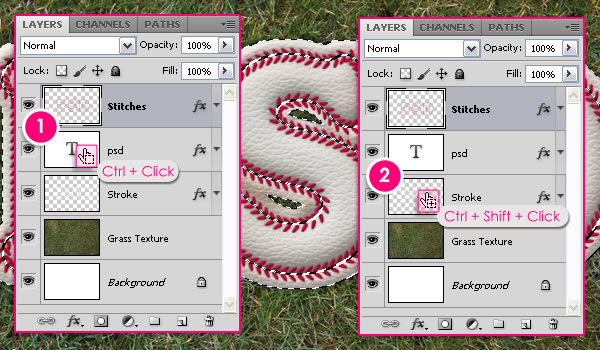
Create a new layer on top of all layers and call it “Grunge”, then change its Blend Mode to Multiply.
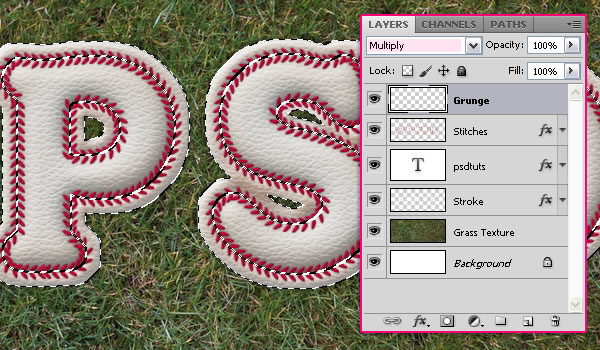
Set the Foreground color to #9a8b74, and choose one of the Undercover Grunge Brush Set brushes to add some dirt to the text.
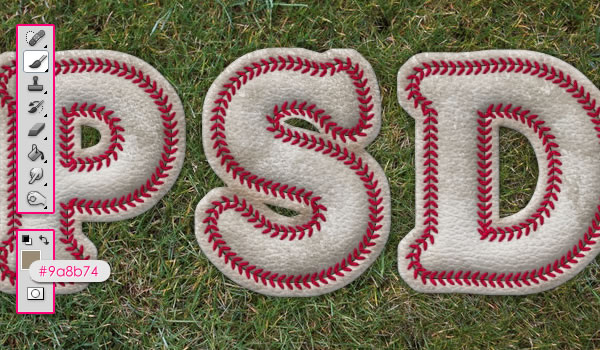
You can adjust the Opacity value if you like. Here it is set to 70%.
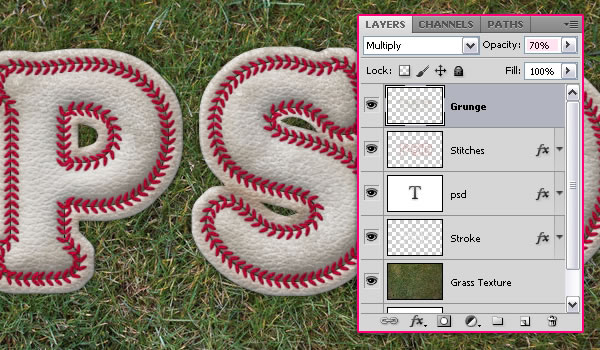
Step 16
Duplicate the “Grass Texture” layer, then drag and drop the copy on top of all layers.
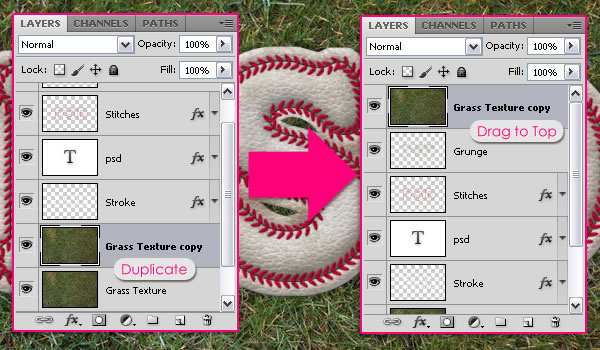
Ctrl/Cmd + Click the text layer’s icon to create a selection.
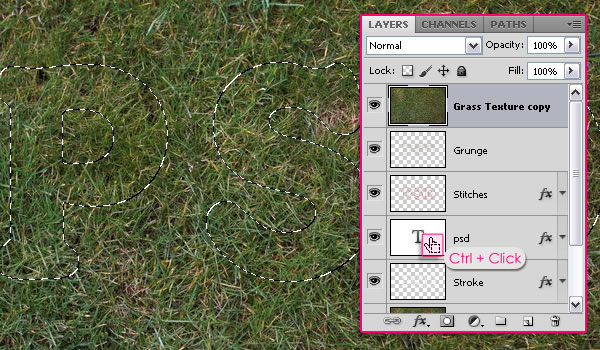
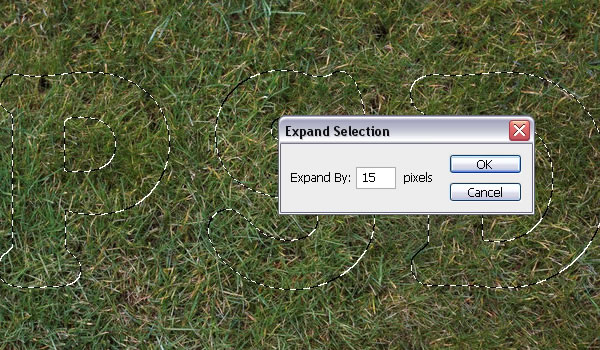
Go to Select > Modify > Expand, and type in 15 to select both the text and the stroke. Then, go to Select > Inverse to invert the selection.
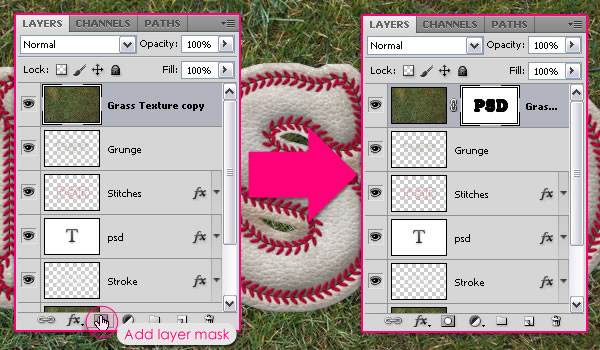
Click the Add layer mask icon down the Layers panel (Window > Layers). This will make the text appear again. We will use the mask to add some grass over the text later on.
Step 17
We’ve modified the grass colors a little bit at the beginning of the tutorial. And now, we will add some Adjustment Layers to enhance the colors of the whole image, which will add a nice vintage feel and help blend all the elements nicely.
So click the Add new adjustment layer icon down the Layers panel, and choose Color Balance.
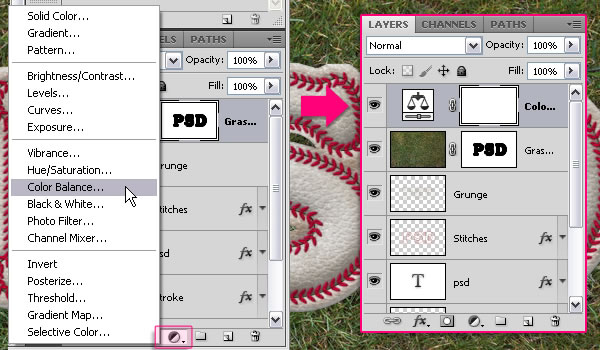
Make sure that the Midtones option under Tone is active, and change the values as shown below.
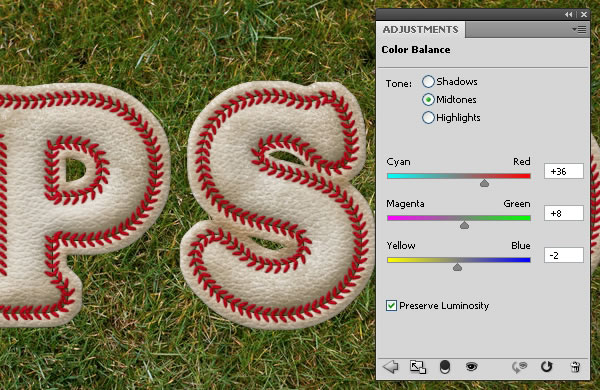
Now select the Shadows, and type in the values below.

Add another Color Balance Adjustment Layer, and change the values of the Midtones as shown below.
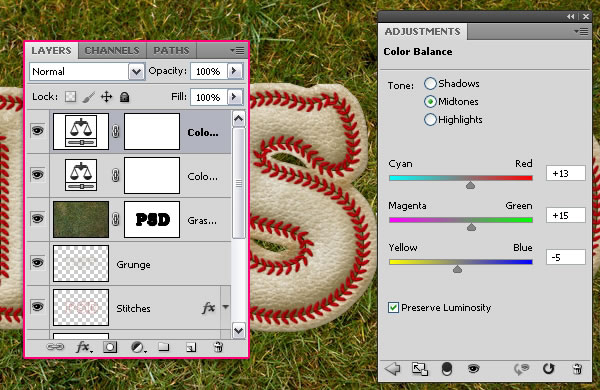
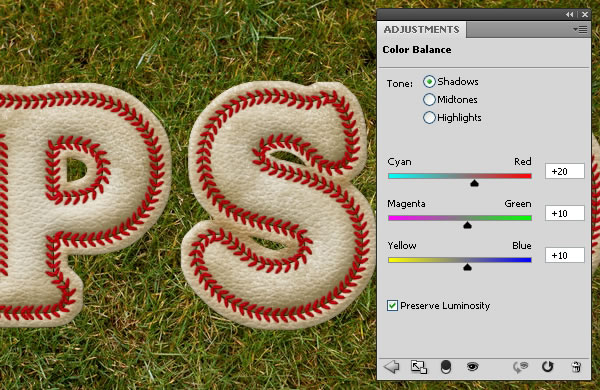
And change the Shadows values as shown below as well. Those values will bring out the many beautiful colors in the grass that weren’t as vivid before.
Step 18
Create a new layer on top of all layers and call it “Gradient”. Change its Blend Mode to Soft Light, and its Opacity value to 70%.
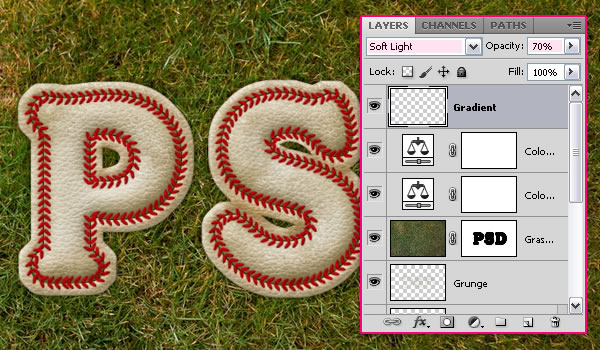
Set the Foreground color to #724c21, pick the Gradient Tool, choose the Foreground to Transparent fill type, click the Radial Gradient icon in the Options bar, and check the Reverse box. Click in the middle of the document and drag to one of the corners to create the Gradient.
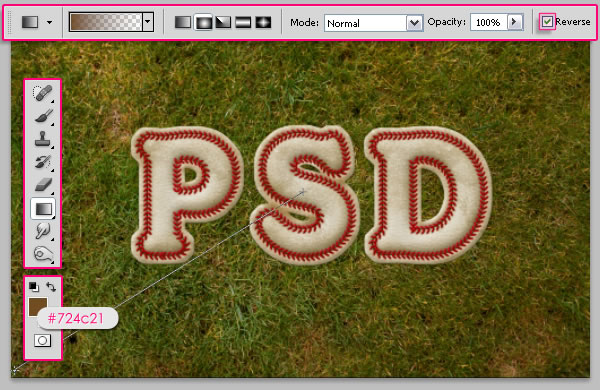
This will add a simple depth to the image so that it doesn’t look so flat.
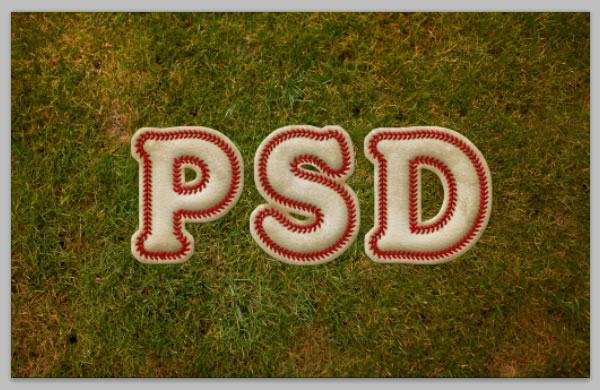
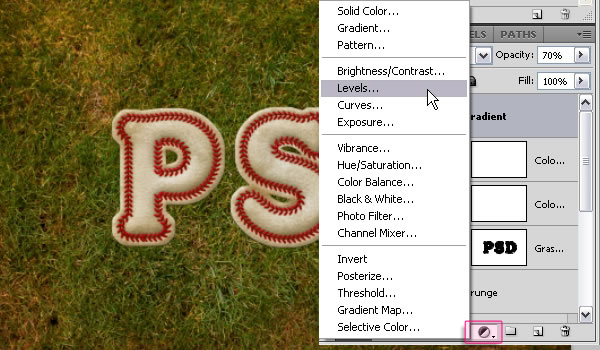
Click the Add new adjustment layer icon and choose Levels this time.
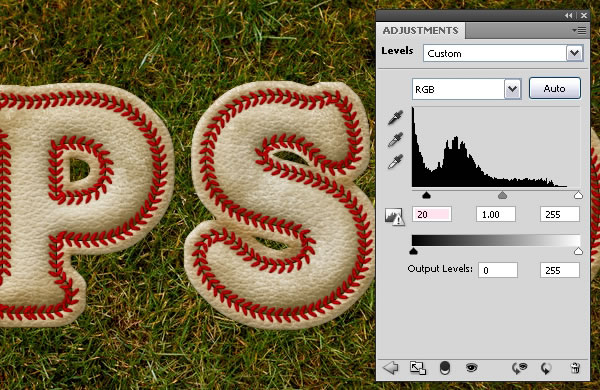
Change the Shadows value to 20. This will darken up the image a little bit. You can play around with the values if you like.
Step 19
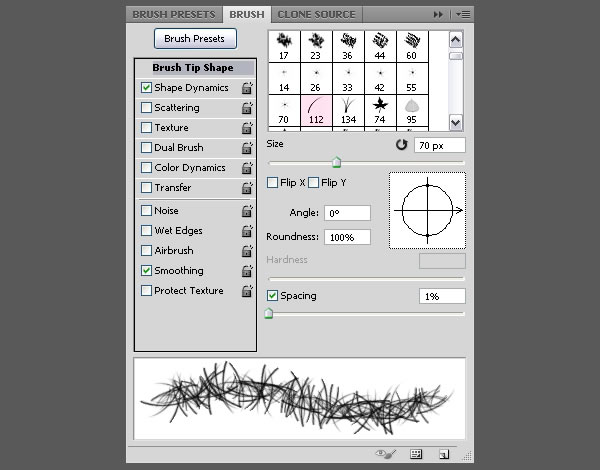
Time to add some grass over the text. So open the Brush panel (Window > Brush) and choose the Dune Grass brush. Modify the Brush Tip Shape as shown below.
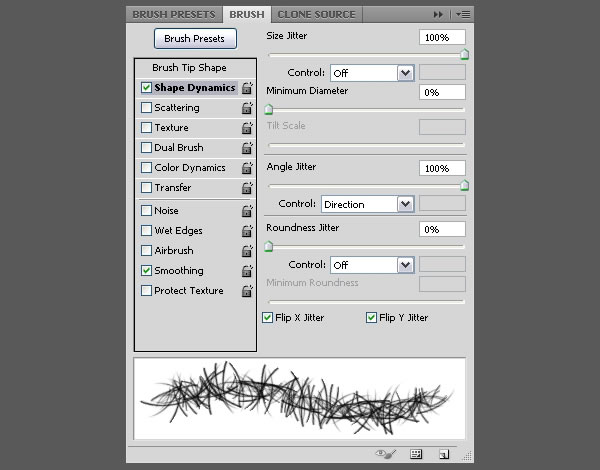
Change the Shape Dynamics values as shown below as well.
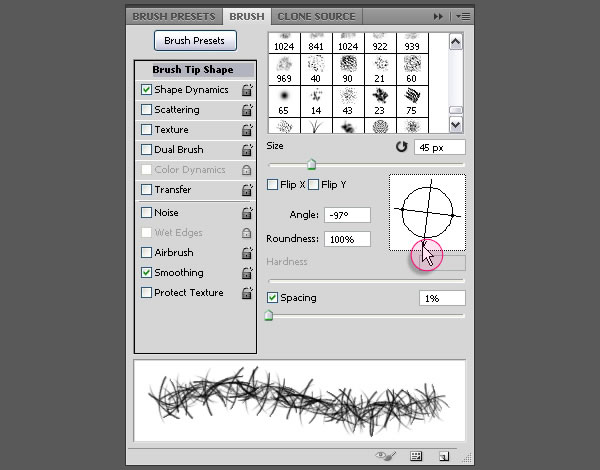
Keep in mind that you can always rotate the brush’s tip under the Brush Tip Shape tab, by moving the Angle arrow around, or typing different values. This will make adding the grass easier in different angles and areas.
Step 20
Set the Foreground color to #000000 and the Background color to #ffffff, pick the Eraser Tool, click the “Grass Texture copy” Layer Mask.
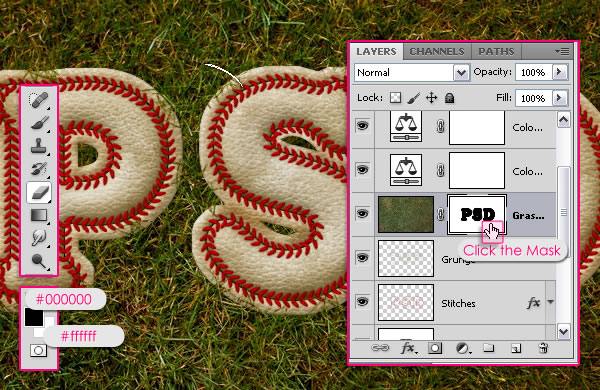
Paint some short strokes near the edges of the text randomly. You can always press Ctrl/Cmd + Z to undo if you don’t like the result then paint again. You can also change the brush’s Size and Angle whenever you need to. Just try not to drown the text in the grass, keep it simple.
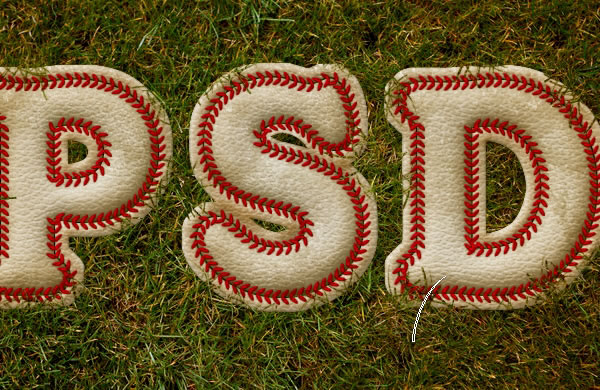
If you set the switch the Foreground and Background colors, you can use the Eraser Tool to erase any unwanted parts with a hard round brush.


0 comments:
Post a Comment